How I Built My Blog • Josh W. Comeau
Over the past few months, I’ve been working on a brand new version of this blog. A couple of weeks ago, I flipped the switch! Here’s a quick side-by-side:
Blog Homepage (Old)


Blog Homepage (New)


From a design perspective, it hasn’t changed too much; I like to think that it’s a bit more refined, but the same general idea. Most of the interesting changes are under-the-hood, or hidden in the details. In this blog post, I want to share what the new stack looks like, and dig into some of those details!
Over the years, my blog has become a surprisingly complex application. It’s over 100,000 lines of code, not counting the content. Migrating everything over was a big project, but super educational. I’ll share my honest thoughts on all of the new technology I used for this blog.
If you’re planning on starting a blog yourself, or are thinking about using some of the technologies I’m using, this post will hopefully be quite helpful!
Let’s start with a quick list of the major technologies used by my blog:
This list probably seems like overkill for a blog, and a few people have asked me why I didn’t opt for a more “lightweight” alternative. There are a few reasons:
-
All of my blog posts are written using MDX, so I needed first-class MDX support.
-
My other main project, my course platform, uses Next.js. I wanted as little context-switching friction as possible.
-
I wanted to get a bit more experience with the latest React features, things like Server Components and Actions.
If it wasn’t for reasons 2 and 3, I probably would have given Astro(opens in new tab) a shot. I’ve also been curious about Remix(opens in new tab) for a long time! I think both are likely fantastic options.
I write blog posts using MDX. It’s probably the most critical part of the tech stack for me.
If you’re not familiar with MDX, it’s essentially a combination of Markdown and JSX. You can think of it as a superset of Markdown that provides an additional superpower: the ability to include custom React elements within the content.
With MDX, I can create interactive widgets and drop ‘em right in the middle of a blog post, like this:
Taken from my blog post, An Interactive Guide to Flexbox.
This ability is crucial for the sorts of content I create. I didn’t want to be limited by the standard set of Markdown elements (links, tables, lists…). With MDX, I can create my own elements! It feels so much more powerful than traditional Markdown, or rich-text content stored in a CMS.
You might be wondering: Why not go “full React”, and skip the Markdown part altogether? When I built the very first version of this blog, way back in 2017, that’s exactly what I did. Each blog post was a React component. There were two problems with this:
-
The writing experience was awful. Having to wrap each paragraph in a
, for example, gets old really fast. -
There was no way to access the content as data. I couldn’t, for example, get a list of the 10 most recently updated blog posts, since each blog post was a chunk of code, not a database record or JSON object.
MDX solves both of these problems, and without really sacrificing anything. I still have the full power of React when I'm writing blog posts!
In terms of workflow, I edit my MDX files directly in VS Code and commit them as code. Article metadata (eg. title, publish date) is set in frontmatter at the top of the file. There are some drawbacks to this method (eg. I have to re-deploy the whole app to fix a typo), but I’ve found it’s the simplest option for me.
There are several ways to use MDX with Next.js. I'm using next-mdx-remote(opens in new tab), mostly because it’s what I use on my course platform and I want the two projects to be as similar as possible. If you’re building a brand-new blog using Next.js, it’s probably worth giving the built-in MDX support(opens in new tab) a shot; it seems a lot more straightforward.
The old version of my blog used styled-components, a CSS-in-JS library. As I’ve written about previously, styled-components isn’t fully compatible with React Server Components. So, for this new blog, I've switched to Linaria(opens in new tab), via the next-with-linaria integration(opens in new tab).
Here’s what it looks like:
import { styled } from '@linaria/react';

const Wrapper = styled.div`
  background: red;
`;
Linaria is an awesome tool. It offers a familiar styled API, but instead of working its magic at runtime, it instead compiles to CSS modules. This means that there is no JS runtime involved, and as a result, it’s fully compatible with React Server Components!
Now, getting Linaria to work with Next has been an uphill battle. I ran into a few weird issues. For example, when I import React in a file without actually using it, I get this bewildering error:
EvalError: TextEncoder is not defined
/node_modules/.pnpm/@wyw-in-js+transform@0.4.1_typescript@5.4.5/node_modules/@wyw-in-js/transform/lib/module.js:223
throw new EvalError(e.message, this.callstack.join('\n| '));
The error messages / stack traces didn’t really help, so I solved most issues by walking backwards through my changes and/or deleting random things until the error disappeared. Fortunately, all of the issues I’ve found are consistent and predictable; it’s not one of those things where the error happens sometimes, or only in production.
Once I learned all of its idiosyncracies, it’s been pretty smooth sailing, though there is one significant remaining issue. And it doesn’t have to do with Linaria at all, it has to do with how Next.js handles CSS modules.
It’s too much of a detour to cover properly in this post, but to quickly summarize: Next.js “optimistically” bundles a bunch of CSS from unrelated routes, to improve subsequent navigation speed and guarantee the correct CSS order. This blog post, for example, loads 245kb of CSS, but it only uses 47kb.Both of these numbers are the full uncompressed values. The actual amount of data sent over the wire is smaller. There is an active discussion on Github(opens in new tab) about this, and it sounds like some upcoming config options could improve the situation.
Given all of this, I can’t really recommend Linaria. It’s a wonderful tool, but it just isn’t battle-tested enough for it to be a prudent decision for most people/teams.
I'm currently most excited about Pigment CSS(opens in new tab), a zero-runtime CSS-in-JS tool being developed by the team behind Material UI. In the future, it will be the CSS library used by their popular MUI component library, which means it will quickly become one of the most battle-tested CSS libraries out there.
It’s still early days, but once they release their version 1.0, I plan on trying to switch. Hopefully by then, Next.js has fixed the bundling issue with CSS Modules. 🤞
Code snippets look very different on the new blog, thanks to a custom-designed syntax theme! Here’s a before/after:
Code Snippets (Old)
Code Snippets (New)
If you’d like to use this theme in your IDE, you can download the JSON files (dark, light). I haven’t tested it, but it uses the same grammar as VSCode and other editors, so it should work.
Link to this headingThe magic of static
I'm using Shiki(opens in new tab) for managing the syntax highlighting. While not specifically built for React, Shiki is designed to work at compile-time, making it a perfect fit for React Server Components. This is surprisingly exciting.
In my old blog, I was using Prism, a typical client-side syntax highlighting library. Because all of the code gets included in the JavaScript bundle, several sacrifices have to be made:
-
We have to be very conservative about the number of languages we support, since each additional language will add kilobytes to our bundle.
-
The syntax highlighting logic is lean, much simpler than the syntax highlighting inside IDEs like VS Code. This gives theme creators less control over the end result, and means we can't share themes between IDE and Prism.
With the minimal set of built-in languages, Prism winds up being 26kb minified and gzipped(opens in new tab), which is incredibly small for a syntax highlighter, but still a substantial addition to the bundle.
With Shiki, it adds 0kb to the JavaScript bundle, it uses the same industry-standard TextMate grammar as VS Code, and it can support dozens of languages at no additional cost.
This means that when I want to include a Haskell snippet, as I did in a random blog post I wrote years ago, it will be fully syntax-highlighted:
pe58 = n
  where
  a p q = scanl (+) p $ iterate (+ 8) q
  b = [[x,y,z] | (x,(y,z)) <- zip (a 3 10) $ zip (a 5 12) (a 7 14)]
  c = zip (scanl1 (+) . map (length . filter isPrime) $ b) (iterate (+ 4) 5)
  [(n,_)] = take 1 $ dropWhile (\(_,(a,b)) -> 10*a > b) $ zip [3,5..] c
Shiki is a joy to work with as a developer. It’s incredibly flexible and extensible. For example, I created my own “annotation” logic, so that I can highlight specific lines of code:
function someRandomFunction() {
  // These two lines are highlighted! You can tell by the
  // background color, and the little bump on the left.

  return 42;
}
On my old blog, syntax highlighting didn't work properly for CSS-in-JS. My template strings would be treated as a standard string, rather than a bit of injected CSS within JS:
With Shiki, I was able to reuse the syntax-highlighting logic that the styled-components VSCode Extension(opens in new tab) provides. And so now, my styled-components are highlighted correctly:
const FunkyButton = styled.button`
  position: absolute;
  background: linear-gradient(
    to bottom,
    red,
    gold
  );

  @media (min-width: 24rem) {
    &:focus {
      background: gold;
    }
  }
`;

export default FunkyButton;
As much as I love Shiki, it does have some tradeoffs.
Because it uses a more powerful syntax-highlighting engine, it’s not as fast as other options. I was originally rendering these blog posts “on demand”, using standard Server Side Rendering rather than static compile-time HTML generation, but found that Shiki was slowing things down quite a bit, especially on pages with multiple snippets. This problem can be solved either by switching to static generation or with HTTP caching.
Shiki is also memory-hungry; I ran into an issue with Node running out of memory(opens in new tab), and had to refactor to make sure I wasn't spawning multiple Shiki instances.
The biggest issue, however, is that sometimes I need syntax highlighting on the client. For example, in my Shadow Palette generator tool, the snippet changes based on how the user edits the shadows:
There’s no way to generate this at compile-time, since the code is dynamic!
For these cases, I have a second Shiki highlighter. This one is lighter, only supporting a small handful of languages. And it isn’t included in my standard bundles, I'm lazy-loading it with next/dynamic(opens in new tab). Since the syntax highlighting itself is slower, I'm using useDeferredValue to keep the rest of the app fast.
The trickiest part was that I needed both a static Server Component as well as a dynamic Client Component, in order for SSR to work correctly. I secretly swap between them on the client, after everything has loaded.
In addition to code snippets, I also have code playgrounds, little Codepen-style editors:
Code Playground
import React from 'react';
import range from 'lodash.range';

import styles from './PrideFlag.module.css';
import { COLORS } from './constants';

function PrideFlag({
  variant = 'rainbow',
  width = 200,
  numOfColumns = 10,
  staggeredDelay = 100,
  billow = 2,
}) {
  const colors = COLORS[variant];

  const friendlyWidth =
    Math.round(width / numOfColumns) * numOfColumns;

  const firstColumnDelay = numOfColumns * staggeredDelay * -1;

  return (
    <div className={styles.flag} style={{ width: friendlyWidth }}>
      {range(numOfColumns).map((index) => (
        <div
          key={index}
          className={styles.column}
          style={{
            '--billow': index * billow + 'px',
            background: generateGradientString(colors),
            animationDelay:
              firstColumnDelay + index * staggeredDelay + 'ms',
          }}
        />
      ))}
    div>
  );
}

function generateGradientString(colors) {
  const numOfColors = colors.length;
  const segmentHeight = 100 / numOfColors;

  const gradientStops = colors.map((color, index) => {
    const from = index * segmentHeight;
    const to = (index + 1) * segmentHeight;

    return `${color} ${from}% ${to}%`;
  });

  return `linear-gradient(to bottom, ${gradientStops.join(', ')})`;
}

export default PrideFlag;
Taken from my blog post, Animated Pride Flags.
For React playgrounds, I use Sandpack(opens in new tab), a wonderful editor created by the folks at CodeSandbox. I’ve previously written about how I make use of Sandpack, and all of that stuff is still relevant.
For static HTML/CSS playgrounds, I'm using my own fork of agneym's Playground(opens in new tab). Sandpack does support static templates, but they rely on Service Workers, which are sometimes blocked by browser privacy settings, leading to broken user experiences.
Lots of folks have asked me how I build the interactive demos in my posts like this:

Are you sure?
This action cannot be undone.
Taken from my blog post, Designing Beautiful Shadows in CSS.
I never quite know how to answer this question 😅. I don’t use any specific libraries or packages for this, it’s all standard web development stuff. I built my own reusable
That said, there are a couple of generic tools that help. I use React Spring(opens in new tab) to smoothly interpolate between values in a fluid, organic fashion. And I use Framer Motion(opens in new tab) for layout animations.
It feels indulgent to have two separate animation libraries, especially since neither is tiny ( 19.4kb(opens in new tab) and 44.6kb(opens in new tab), respectively). I include React Spring as a core library and dynamically import Framer Motion when needed.
Truthfully, though, Framer Motion should be able to do everything that React Spring can do, so if I had to pick a “desert island” animation library, it would probably be Framer Motion.
If you’re reading this on desktop, you might’ve seen this little fella off to the side:
It’s a like button! Which is kind of silly… social networks use like buttons to inform their algorithm about which pieces of content to surface. This blog has no discovery algorithm, so it serves no purpose other than being cute.
Each visitor can click the button up to 16 times, and the data is stored in MongoDB. The database record looks something like:
{
  "slug": "promises",
  "categorySlug": "javascript",
  "hits": 123456,
  "likesByUser": {
    "abc123": 16,
    "def456": 4,
    "ghi789": 16,
    // ...
  }
}
The IDs are generated based on the user’s IP address, hashed using a secret salt to preserve anonymity. This blog is deployed on Vercel, and Vercel provides the user’s IP through a header.
Originally I used IDs generated on the client and stored in localStorage, but legendary sleuth Jane Manchun Wong showed me why that was a bad idea by spamming the API endpoint and generating tens of thousands of likes. 😅
One of my favourite things about Next.js is that you don’t need a separate Node.js backend. The logic for liking posts is dealt with in a Route Handler(opens in new tab), which functions almost exactly like an Express endpoint.
Link to this headingElement cohesion
I spent an unreasonable amount of time on contextual styles, making sure that my generic “LEGO brick” components composed nicely together.
For example, I have an
:
Compare it to a code snippet not inside a sidenote:
function findLargestNum(nums: Array<number>) {
  if (nums.length === 1) {
    return nums[0];
  }

  return Math.max(...nums);
}Instead of having a transparent background and gray outline, the CodeSnippet inside the Aside gets a brown background. Other details, like the annotations and the “Copy to Clipboard” button, also have custom colors.
Instead of having a light blue background, the CodeSnippet inside the Aside gets a golden background. Other details, like the annotations and the “Copy to Clipboard” button, also have custom colors.
I created custom colors for all four Aside variants (info, success, warning, error), for each color theme (light, dark). Code snippets also receive different margin/padding when they’re within an Aside, and this changes based on the viewport size, as well as whether or not they’re the final child in the container. It gets quite complicated, considering all of the possible combinations!
This is just one example, too. Lots of other components have “adaptive” styles that change depending on their context, to make sure everything feels cohesive. It was a ton of work, but I find the result super satisfying. 😄
Link to this headingThe rainbow
On the desktop homepage, you might’ve noticed that there’s a big new rainbow:

This rainbow responds to your cursor, segments bending towards it like iron shavings reacting to a magnet.
There’s an extra little easter egg as well: if you hover over the rainbow for a few seconds, a little “edit” button appears. Clicking it opens the 🌈 Rainbow Configurator.

Here’s the twist: you’re not just changing the rainbow on your device, you’re changing it for everybody. Each change is immediately broadcast around the world, rainbows shooting through network cables and wifi signals so that we can all enjoy the rainbow you’ve designed. 💖
This is made possible by PartyKit(opens in new tab), a fabulous modern tool created by the illustrious Sunil Pai. It uses WebSockets so that the changes are lightning-fast. I can’t say enough good things about PartyKit. The developer experience is world-class.
One thing I failed to consider is how chaotic it would be with hundreds of people trying to edit the rainbow at the same time 😅. When I first launched the new blog, I received several bug reports from people thinking that the rainbow was glitching out, not aware that other people were wrestling over the controls. Things have calmed down now, but I should still find a way to make this clearer.
Link to this headingView Transitions
When navigating between pages, there should be a subtle cross-fade animation. If the header is in a new location, it should slide into place:
This uses the very-powerful View Transitions API(opens in new tab). It isn’t yet supported in all browsers, but I think it’s a neat little progressive enhancement.
This API works by capturing virtual screenshots of the UI right before a transition, and manipulating that screenshot and the real UI, sliding and fading things around to create the illusion that two separate elements on two separate pages are the same.
It’s honestly pretty tricky to work with; I think the API design is great, but the underlying problem space is just so complicated, there’s no way to avoid some complexity. Expect to run into little quirks, like things not maintaining their aspect ratio, or text being glitchy.
I’ve found Jake Archibald’s content super helpful for wrapping my mind around View Transitions. For example, his article on handling aspect-ratio changes(opens in new tab).
Getting it to work within the Next.js App Router was a bit of a challenge. I used the use-view-transitions(opens in new tab) package, and created a low-level Link component that wraps around next/link. You can check it out in the Sources pane if you’re curious!
Link to this headingSearch
My blog finally has a search feature! You can access it by clicking the magnifying glass in the header.
I'm using Algolia(opens in new tab) to do all the hard stuff, like fuzzy matching. At some point, I may feed all of my blog post data to an AI agent and make a chatbot, but for now, basic search seems to do the trick.
One cute little detail: clicking the “trash” icon will clear the search term, but I set it up so that it isn’t instantaneous. I wanted it to seem like the trash can was gobbling up each character. 😄
Link to this headingModern outline icons
At first glance, the icons on this site seem pretty much like the old icons, but they’ve been refined. Many of them have new micro-interactions!
My process for this involves starting with the icons from Feather Icons(opens in new tab), since they fit my aesthetic well. Then, I either pick apart or reconstruct their SVG so that I can animate independent parts.
For example, I have an arrow bullet that stretches out on hover:
I started by grabbing the SVG code for Feather Icons’ ArrowRight, and turning it into JSX. The final code looks something like this:
import { useSpring, animated } from 'react-spring';

const SPRING_CONFIG = {
  tension: 300,
  friction: 16,
};

function IconArrowBullet({
  size = 20,
  isBooped = false,
}: Props) {
  const shaftProps = useSpring({
    x2: isBooped ? 23 : 18,
    config: SPRING_CONFIG,
  });
  const tipProps = useSpring({
    points: isBooped
      ? '17 6 24 12 17 18'
      : '12 5 19 12 12 19',
    config: SPRING_CONFIG,
  });

  return (
    <svg
      fill="none"
      width={size / 16 + 'rem'}
      height={size / 16 + 'rem'}
      viewBox="0 0 24 24"
      stroke="currentColor"
      strokeWidth="2"
      strokeLinecap="round"
      strokeLinejoin="round"
      xmlns="http://www.w3.org/2000/svg"
    >
      <animated.line
        x1="5"
        y1="12"
        y2="12"
        {...shaftProps}
      />
      <animated.polyline {...tipProps} />
    svg>
  );
}

export default IconArrowBullet;
Like a real arrow, this icon is composed of a shaft and a tip, made with an SVG line and polyline. Using React Spring, I change the x/y values for some of the points when it’s booped. This was a process of trial and error, moving individual points until it felt right.
Lots of the icons on this site are given similar micro-interactions. I even have one more special easter egg planned for one of the icons, something I didn’t quite finish in time for the launch. 😮
Link to this headingAccessibility
In “The Surprising Truth About Pixels and Accessibility”, I show how using the rem unit for media queries is more accessible. It ensures that our layout adapts gracefully if the user cranks up their browser’s default font size.
Every now and then, a reader would notice that my actual blog used pixel-based media queries. I wasn’t even practicing what I was preaching! What a hypocrite!
When I first built the previous version of my blog, I wasn’t aware that rem-based media queries were more accessible; I discovered it while building my course platform. Retrofitting my blog to use rem-based media queries was a big job, and I didn’t want to wait until that was done to share what I had learned!
And so, whenever someone emailed me about this, I would share this rationale, but I would still feel quite embarrassed about it. 😅
Needless to say, this new blog uses rem-based media queries throughout. I’ve learned a lot about accessibility over the years (including through my own short-term disability), and I’ve applied everything I’ve learned to this new blog.
Of course, I’m always still learning, so if you spot anything inaccessible on this blog, please do let me know!
As I mentioned earlier, one of the biggest changes with the new blog was switching from the Pages Router to the App Router. I know lots of folks are considering making the same switch, so I wanted to share my experience, to help inform your decision.
Honestly, my experience was a bit of a mixed bag 😅. Let’s start with the good stuff.
The mental model is wonderful. The “Server Components” paradigm feels much more natural than getServerSideProps. There’s definitely a learning curve, but I got the hang of it pretty quickly. In addition to the improved ergonomics, the new system is more powerful. For example: in the Pages router, only the top-level route component could do backend work, whereas now, any Server Component can.
Another benefit with Server Components is that we no longer need to include each and every React component in our client-side bundles. This means that “static” components are omitted entirely from the bundles. It also means we can use more-powerful server-exclusive libraries like Shiki, knowing that we don’t have to worry about bundle bloat.
In theory, that should lead to some pretty significant performance benefits, but that hasn’t really been my experience. In fact, the performance of my new blog is slightly worse than my old blog:
Lighthouse Report (Old)
Lighthouse Report (New)
There are a ton of caveats to this though:
-
It’s not really an apples-to-apples comparison, since I added a bunch of new features and details to the new blog. It wasn’t a straight 1:1 migration.
-
A big contributing factor is the CSS bundling issue(opens in new tab) I mentioned earlier. If you don’t use CSS Modules (or a tool that compiles to CSS Modules), you won’t run into this issue.
-
Because I sprinkle so many interactions around using React Spring, a lot of otherwise-static components wound up needing to become Client Components. I don’t actually have that many Server Components.
-
It’s very possible that I’ve missed opportunities to improve performance, or have made mistakes in my implementation.
It’s easy to get disheartened looking at numbers, but when I throttle my CPU/network and do side-by-side comparisons, I can’t really tell the difference. I’m a bit concerned about the SEO impact of a lower Lighthouse score, but I think if the Next team addresses the CSS bundling issue, it should wind up being roughly equivalent.
While we’re on the topic of slow performance, the development server is much slower with the App Router. It’s gotten worse and worse as my blog has grown. Here are the current stats:
-
With the Pages Router, my dev server would take 7-12 seconds to boot up, depending on the state of the cache. With the App Router, these numbers have ballooned to 30-60+ seconds.
-
Hot reloading in the Pages Router felt instantaneous; By the time I tabbed from the editor to the browser, my change was there. With the App Router, it takes anywhere from 1 to 5 seconds.
-
Sometimes, a page load will just randomly take forever, like this:

It’s pretty painful 😬. When I switch gears to work on my course platform (which still uses the Pages Router), it feels like a breath of fresh air.
I should note: because I’m using Linaria, I’ve had to opt out of Turbopack, their modern Rust-based alternative to Webpack. It’s possible that dev performance is not an issue with Turbopack enabled. But I suspect that lots of us will be in the same situation, where we need Webpack for some package or other, and it shouldn’t be this slow; the Pages router used Webpack, and it was zippy!
The good news is that the Next.js team is aware of these sorts of issues and have made dev performance a priority. The App Router is still in its infancy, and there are bound to be some growing pains. I have a lot of confidence that the Next.js team will fix this stuff (the team is awesome and they’ve already addressed many of the issues I’ve brought up!). The App Router may have been marked as “stable”, but honestly it still feels pretty nascent to me.
The vision behind React Server Components and the App Router is inspiring. For all of the jokes about the React community “reinventing” PHP, I really do think that Meta/Vercel have done something truly remarkable, and once they work out all of the kinks, it will definitively become the best way to build React applications. But today, it feels like we’re firmly in “early adopter” territory.
I’m glad to have migrated my blog to the App Router (and I'll feel even better about it when the CSS issues are resolved 😅), but I'm also in no rush to migrate my course platform.
I’ve been teaching React for something like 7 years now. I started teaching at a local coding bootcamp, developing their React curriculum and working with students one-on-one. I’ve published 22 articles on React through this blog. And I’ve created The Joy of React(opens in new tab), a comprehensive online course that digs into how React works and how to use it effectively.
This course is focused on the core mechanisms of React, but the final module is all about the Next.js App Router and React Server Components. In fact, the final project has you build an interactive MDX-based blog. 😄
It looks like this:
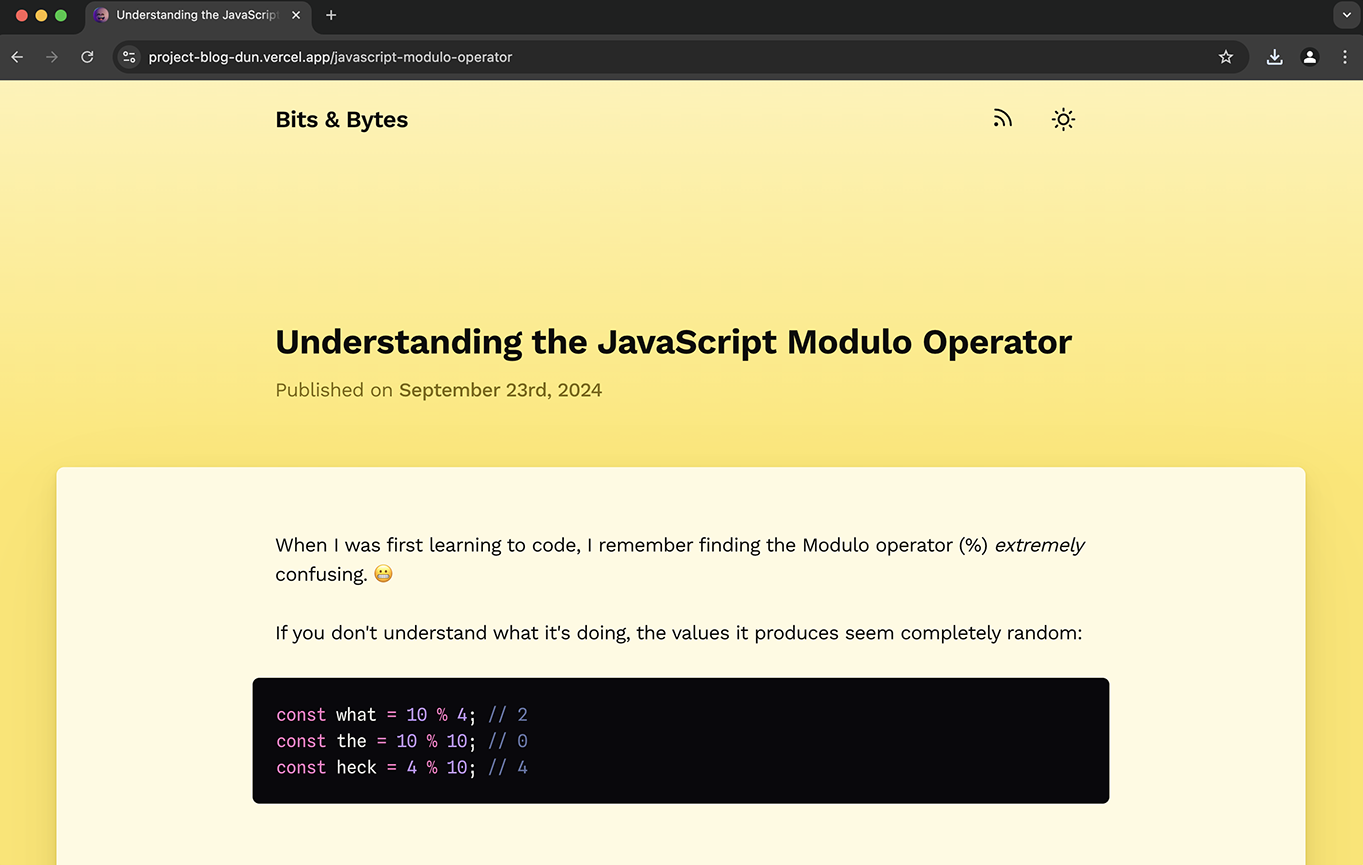
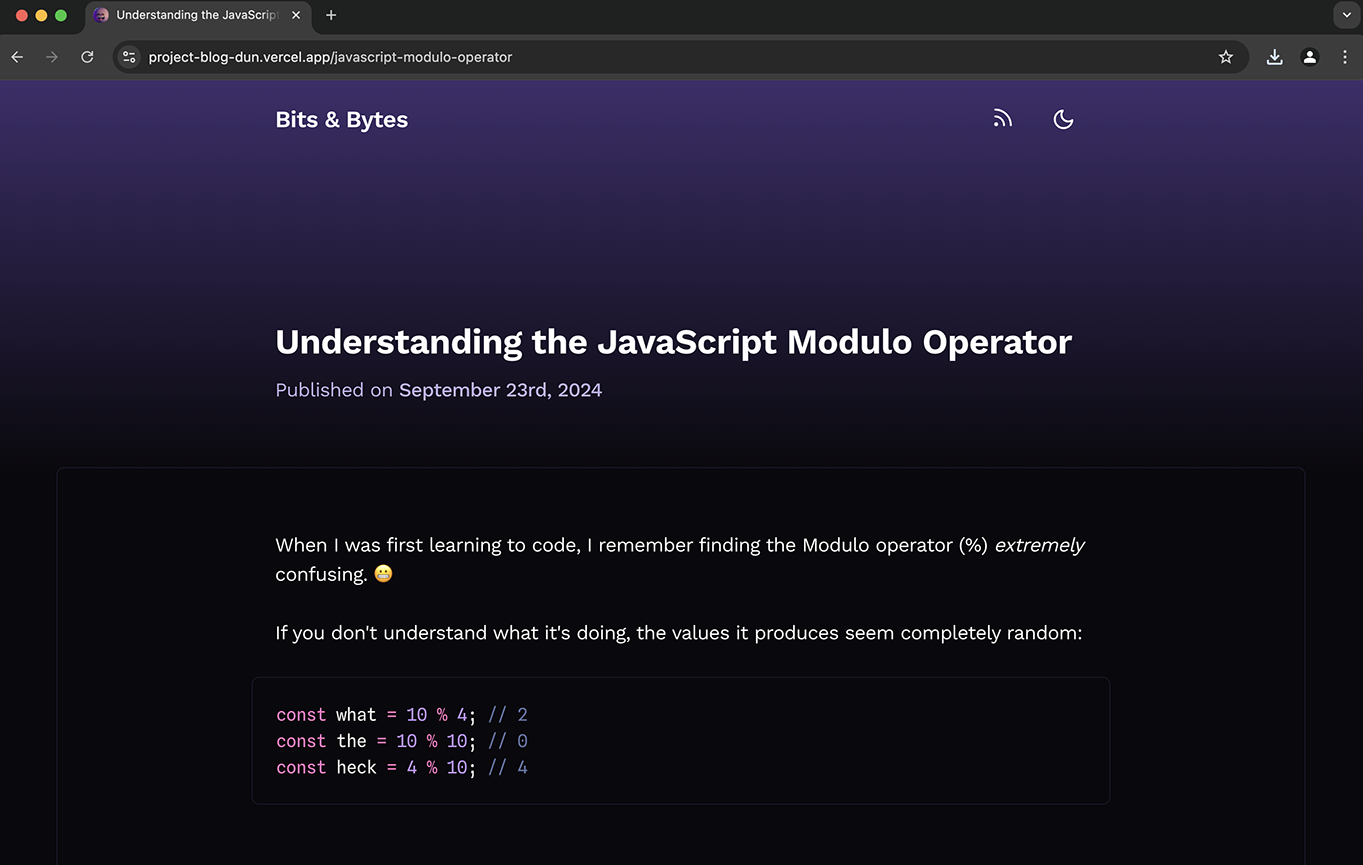
It’s not the most complex thing we cover in the course, but it is one of the most practical. And the best part is that you can use it as the foundation for your actual blog! This isn’t just a contrived course project, it can become your own real-world home base on the internet. 😄
You can learn more here:
Last updated on
May 5th, 2026